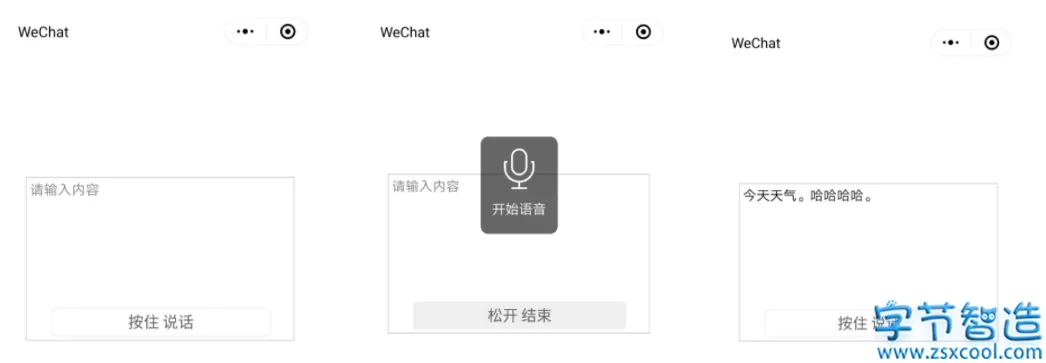
实现的功能是获取语音,并将语音转为文字,实现效果如下:
1. 小程序后台添加插件:微信同声传译
登录小程序后台:https://mp.weixin.qq.com
1.1 设置 -> 第三方设置 -> 添加插件
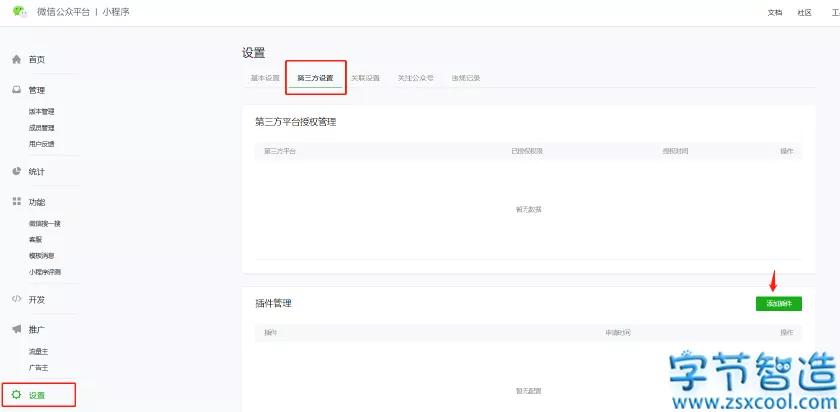
1.2 输入“微信同声传译”,点击搜索,之后选择并点击添加

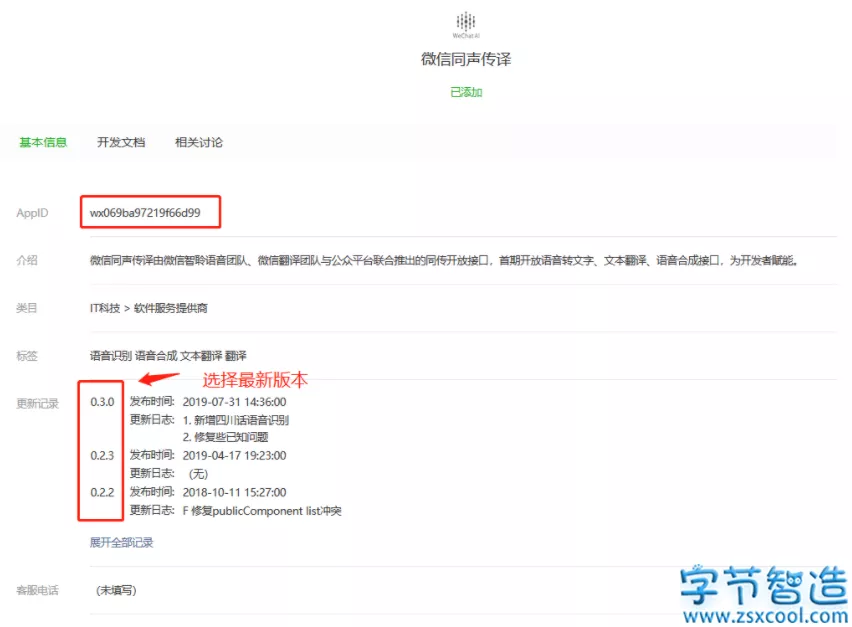
1.3 成功添加后,点击详情

1.4 复制它的AppID和最新版本号(后序有用)。
2. 配置
去app.json进行配置
其中,version的值对应上面的版本号,provider的值对应上面的AppID
"plugins": {
    "WechatSI": {
      "version": "0.3.0",
      "provider": "wx069ba97219f66d99"
    }
},
3. 代码实现
3.1 wxml代码
< view class="yuyinWrap" >
  < textarea class='yuyinCon' placeholder='请输入内容' value='{{content}}' >< /textarea >
  < !--  -- >
  < view class='' >
    < button class="yuyinBtn {{recordState == true ? 'yuyinBtnBg':''}}" bindtouchstart="touchStart" bindtouchend="touchEnd" >
      < text wx:if="{{recordState == false}}" >按住 说话< /text >
      < text wx:else >松开 结束< /text >
    < /button >
  < /view >
  < !-- 开始语音 弹出语音图标表示正在录音 -- >
  < cover-view class="startYuyinImage" wx:if="{{recordState == true}}" >
    < cover-image src="../resource/image/yuyin-min.png" >< /cover-image >
    < cover-view >开始语音< /cover-view >
  < /cover-view >
< /view >
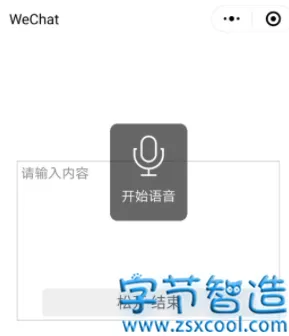
效果如下:
3.2 js 实现代码
实现了textarea可以手动输入,也可以语音转为文字填入。代码解析看注释。
具体可以看官网:https://developers.weixin.qq.com/miniprogram/dev/extended/service/translator.html
const app = getApp();
//引入插件:微信同声传译
const plugin = requirePlugin('WechatSI');
//获取全局唯一的语音识别管理器recordRecoManager
const manager = plugin.getRecordRecognitionManager();

Page({

  /**
   * 页面的初始数据
   */
  data: {
    //语音
    recordState: false, //录音状态
    content:'',//内容
  },
  /**
   * 生命周期函数--监听页面加载
   */
  onLoad: function (options) {
    //识别语音
    this.initRecord();
  },
  // 手动输入内容
  conInput: function (e) {
    this.setData({
      content:e.detail.value,
    })
  },
  //识别语音 -- 初始化
  initRecord: function () {
    const that = this;
    // 有新的识别内容返回,则会调用此事件
    manager.onRecognize = function (res) {
      console.log(res)
    }
    // 正常开始录音识别时会调用此事件
    manager.onStart = function (res) {
      console.log("成功开始录音识别", res)
    }
    // 识别错误事件
    manager.onError = function (res) {
      console.error("error msg", res)
    }
    //识别结束事件
    manager.onStop = function (res) {
      console.log('..............结束录音')
      console.log('录音临时文件地址 -->' + res.tempFilePath);
      console.log('录音总时长 -->' + res.duration + 'ms');
      console.log('文件大小 --> ' + res.fileSize + 'B');
      console.log('语音内容 --> ' + res.result);
      if (res.result == '') {
        wx.showModal({
          title: '提示',
          content: '听不清楚,请重新说一遍!',
          showCancel: false,
          success: function (res) {}
        })
        return;
      }
      var text = that.data.content + res.result;
      that.setData({
        content: text
      })
    }
  },
  //语音  --按住说话
  touchStart: function (e) {
    this.setData({
      recordState: true  //录音状态
    })
    // 语音开始识别
    manager.start({
      lang: 'zh_CN',// 识别的语言,目前支持zh_CN en_US zh_HK sichuanhua
    })
  },
  //语音  --松开结束
  touchEnd: function (e) {
    this.setData({
      recordState: false
    })
    // 语音结束识别
    manager.stop();
  },
})
注意:测试时,在微信开发者工具无效果,要预览或者真机调试下,手机进行测试。

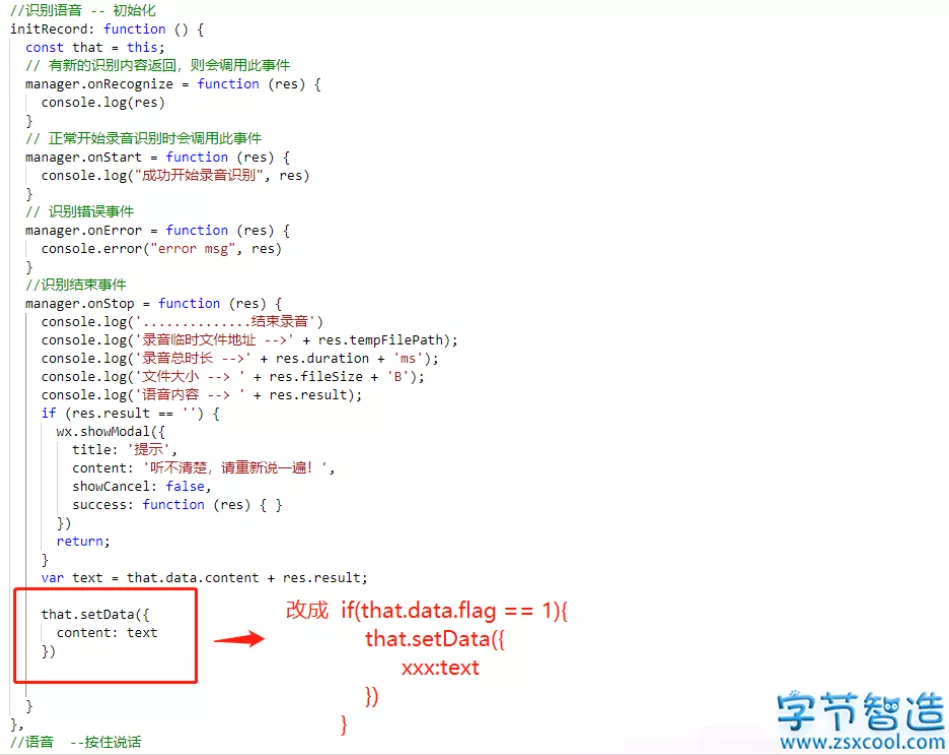
多个按钮独立使用的做法:
1. 使用data-flag,设置不同的值来标识不同的按钮。可设置 1,2,3…或者其他也行。

2. js的data设置参数flag
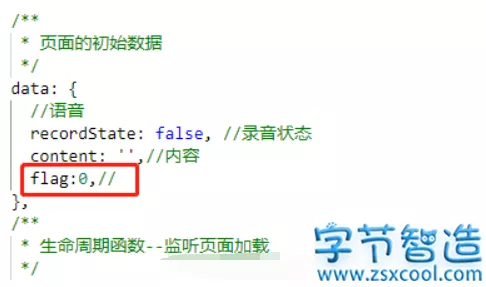
3. 在touchStart方法里,获取flag值。
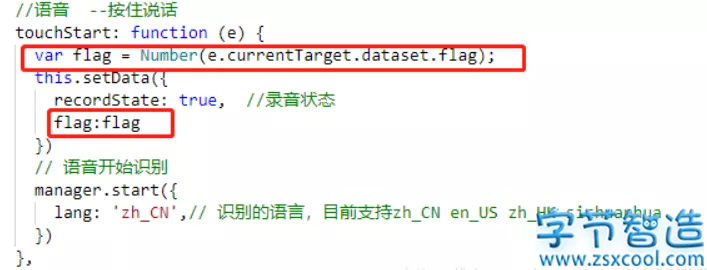
4. 如下,判断flag值,给不同按钮相应的参数进行赋值。
3.3 css 实现代码
/* pages/yuyin/yuyin.wxss */

.yuyinWrap {
  position: relative;
  margin-top:300rpx;
}

.yuyinCon {
  border: 1px solid #ccc;
  margin: 0 auto;
  padding: 10rpx 10rpx 70rpx;
}

.yuyin {
  position: absolute;
  bottom: 0;
  left: 48rpx;
  font-size: 36rpx;
  color: #999;
  padding-bottom: 10rpx;
}

.yuyin icon.iconfont {
  font-size: 34rpx;
  padding: 0 17rpx 15rpx;
  border-radius: 50%;
  background: #73dbef;
  margin-right: 14rpx;
  color: #fff;
}

.consultYuyin {
  height: 100%;
  width: 90%;
}

.icon-jianpan1 {
  position: absolute;
  left: 10rpx;
  bottom: 6px;
  color: #606267;
  font-size: 60rpx;
}

.yuyinBtn {
  width: 70%;
  height: 70rpx;
  position: absolute;
  right: 112rpx;
  bottom: 12rpx;
  border: 1px solid #eee;
  background: #fff;
  color: #606267;
  line-height: 62rpx;
}

.yuyinBtnBg {
  background: #eee;
}

.yuyinBtn::after {
  /* background: #fff; *//* color: #000; */
  border-radius: 0;
  border: none;
}

.startYuyinImage {
  position: fixed;
  top: 210rpx;
  left: 50%;
  width: 190rpx;
  height: 240rpx;
  background: rgba(0, 0, 0, 0.6);
  border-radius: 20rpx;
  color: #fff;
  text-align: center;
  margin-left: -95rpx;
}

.startYuyinImage cover-image {
  margin: 30rpx auto;
  width: 100rpx;
  height: 100rpx;
}

.startYuyinImage cover-view {
  margin-top: 25rpx;
}
必须 注册 为本站用户, 登录 后才可以发表评论!